Thanks to a combination of Lightroom and Photoshop, your dog portraits can be drastically improved with a little bit of editing, so follow along.
After spending all that time getting the dog to stand still, pose just right, and balancing your camera settings with focus, you've got the perfect shot of your favorite pooch. But the image looks a little washed out, even lackluster. But thanks to the powerful tools sitting inside Lightroom Classic and Photoshop CC, you can transform these lowly shots into something magnificent if you follow the right steps. So, let me guide you through this edit I made of my dog, Benji, to see just how easy it can be to go from zero to hero.
1. Balance the Color
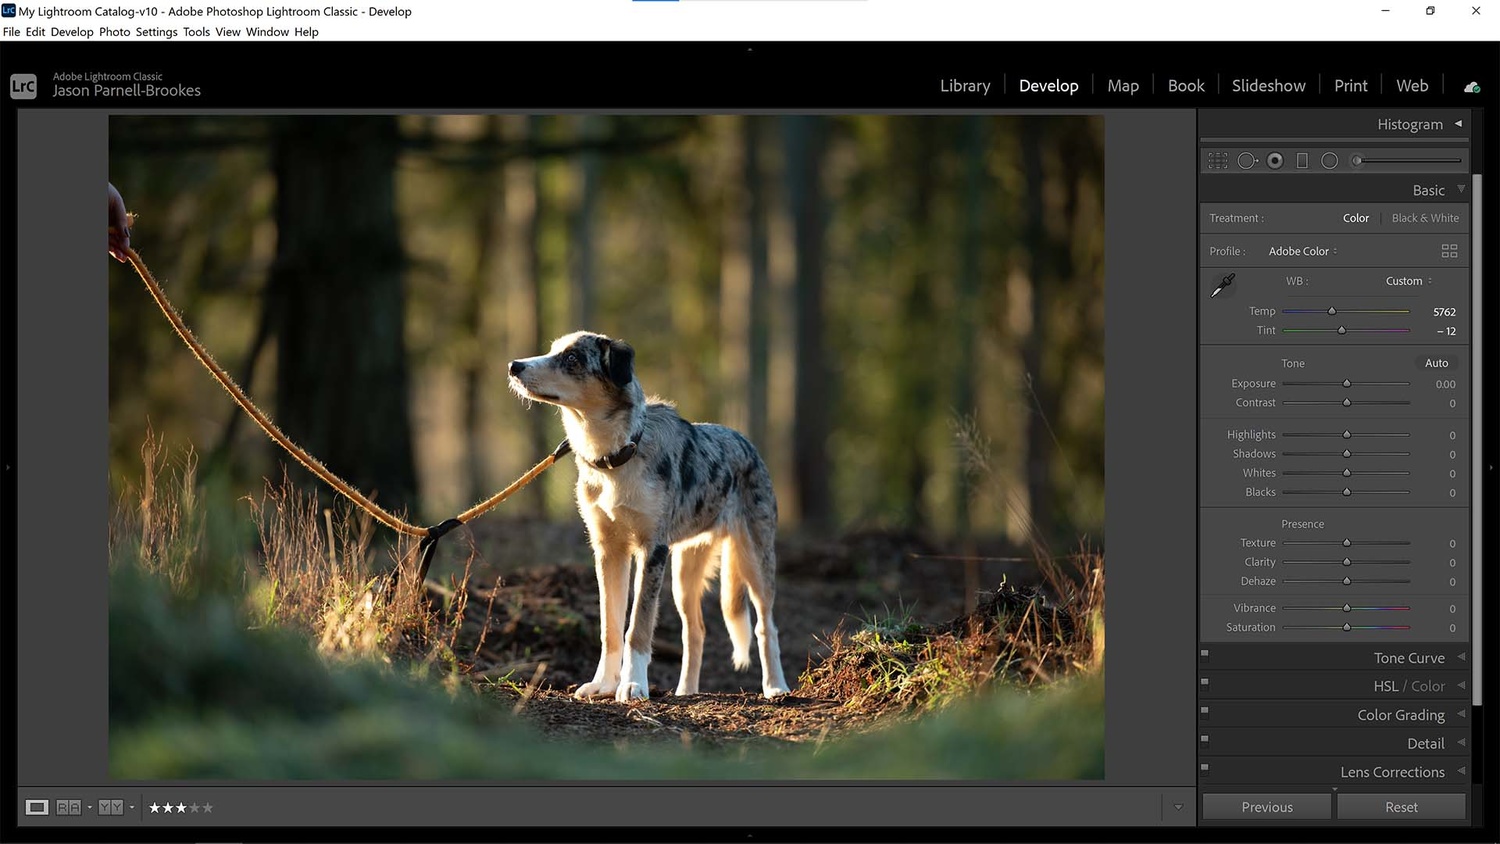
Nailing the right white balance to match the scene is crucial to creating the kind of atmosphere you want in your shot.
After importing the image into Lightroom Classic, the first step is to change up the white balance. For dog portraits, I prefer a warmer white balance, because to me, it feels more inviting and intimate. I created a custom white balance with the Temp slider at 5,762 and Tint slider at -12. You may want to use a preset such as Shade or Cloudy to enhance warmer tones.
2. Adjust Blacks and Highlights
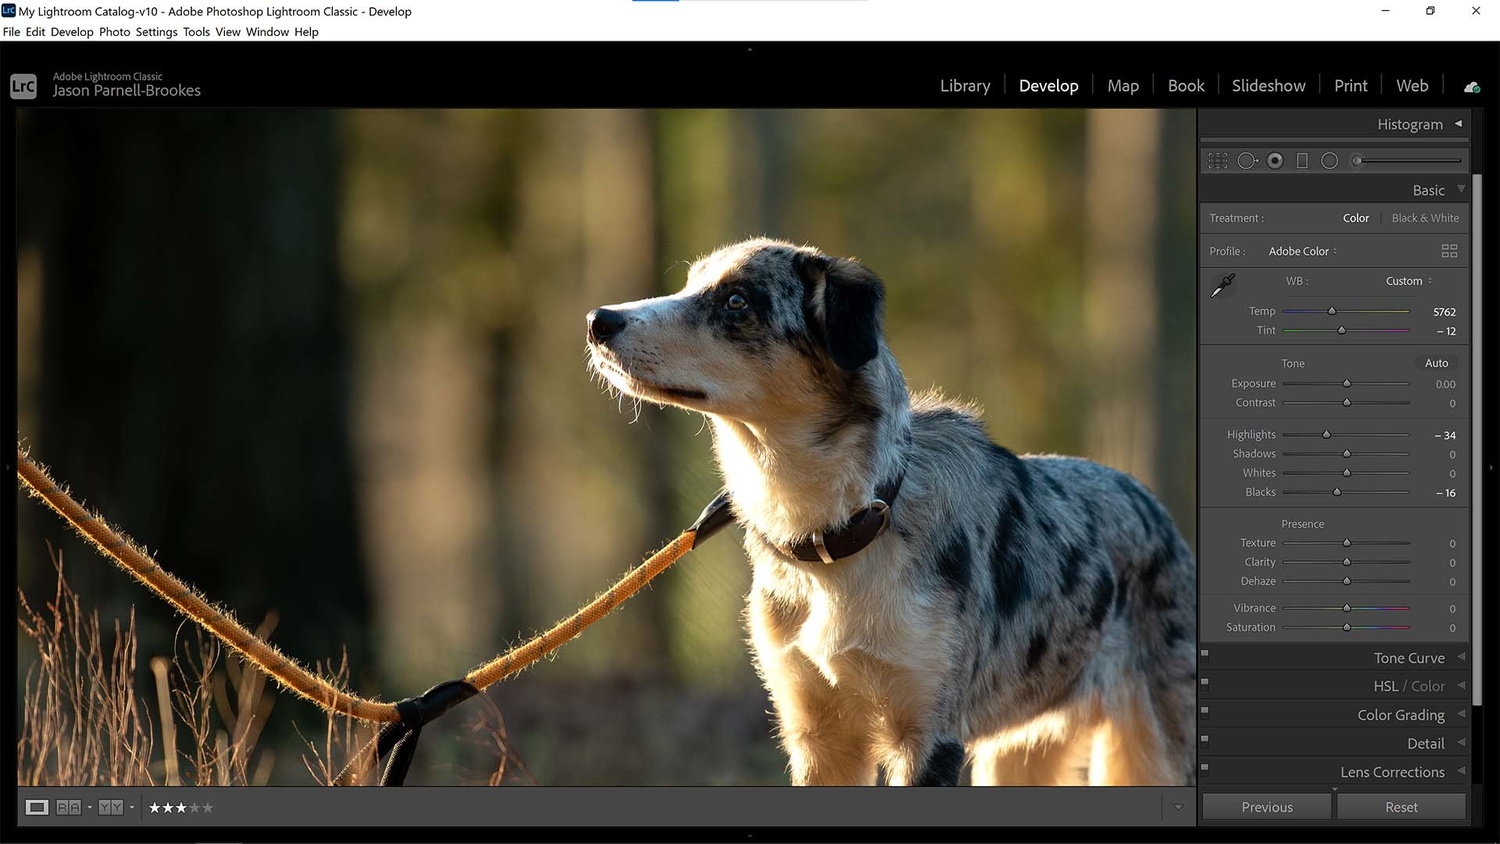
To gain a little more dynamic range in the shadows, lower the Blacks slider, or if you need to regain lost, overexposed areas, then reduce the Highlights slider.
The highlights on Benji here were a little overexposed, so I turned down the Highlights slider to -34 to regain some detail in those areas. I also wanted the darker areas to appear deeper, so I lowered the Blacks slider to -16. Notice how the tree in the background and the darker patches of fur on Benji's body are now almost pitch black. This kind of dynamic range will allow the portrait to stand out when among other images in a gallery either online or in person.
3. Remove Distractions
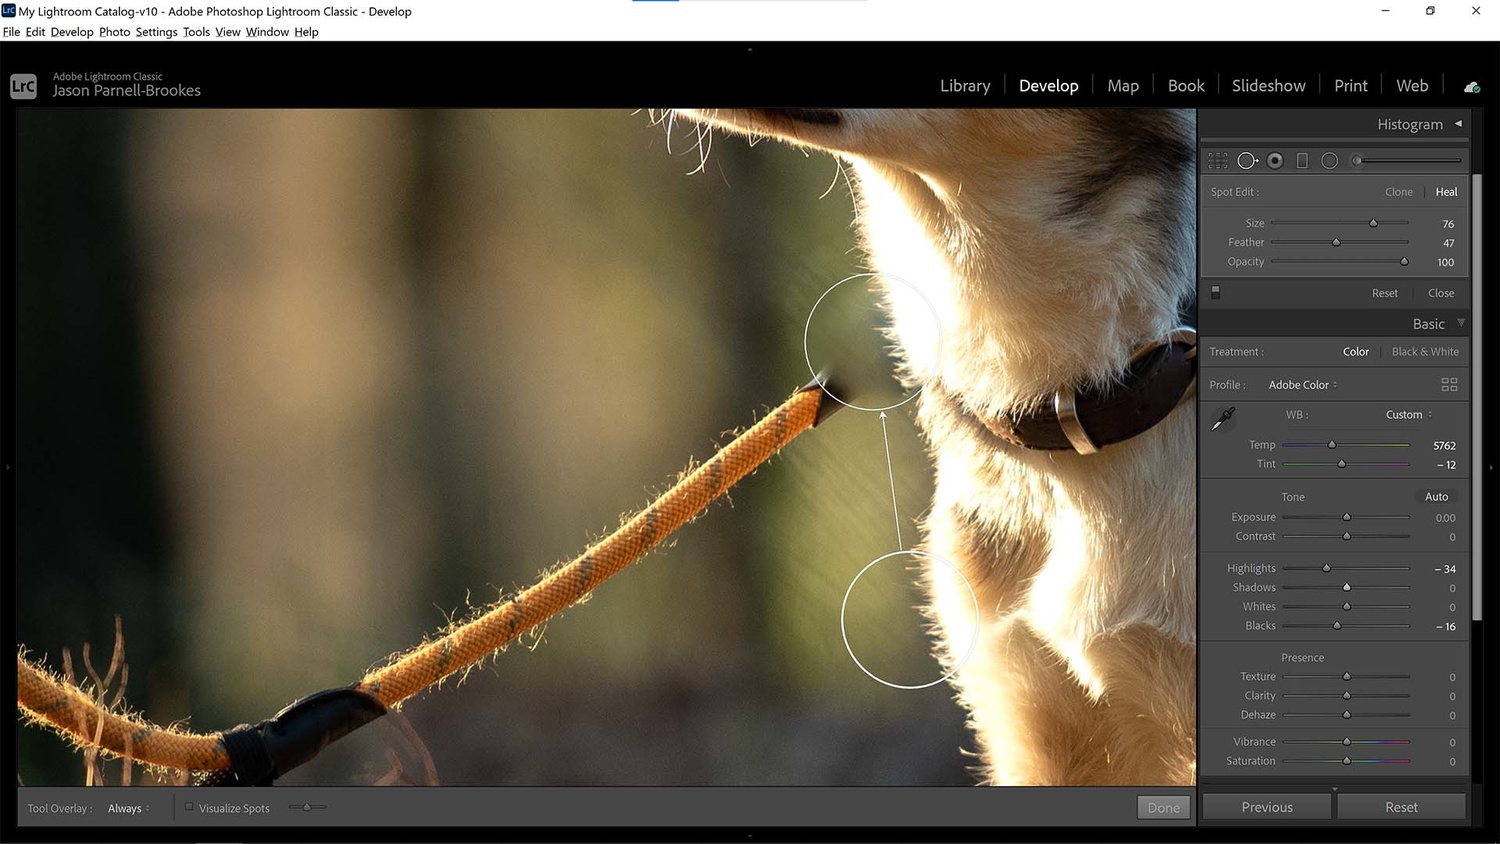
Distractions such as the dog's lead can ruin a nice portrait, so it's best to use the Spot Removal tool to rid them from the image.
Unfortunately, Benji was on lead for this shot, so we needed to take this out of the picture entirely. With the Spot Removal tool (Q) I first started by removing the lead next to his neck fur because I wanted to accurately line up the fur with another patch on his shoulder. After highlighting the offending area, I moved the sample selection so that the fur seamlessly continued up the side of his neck.
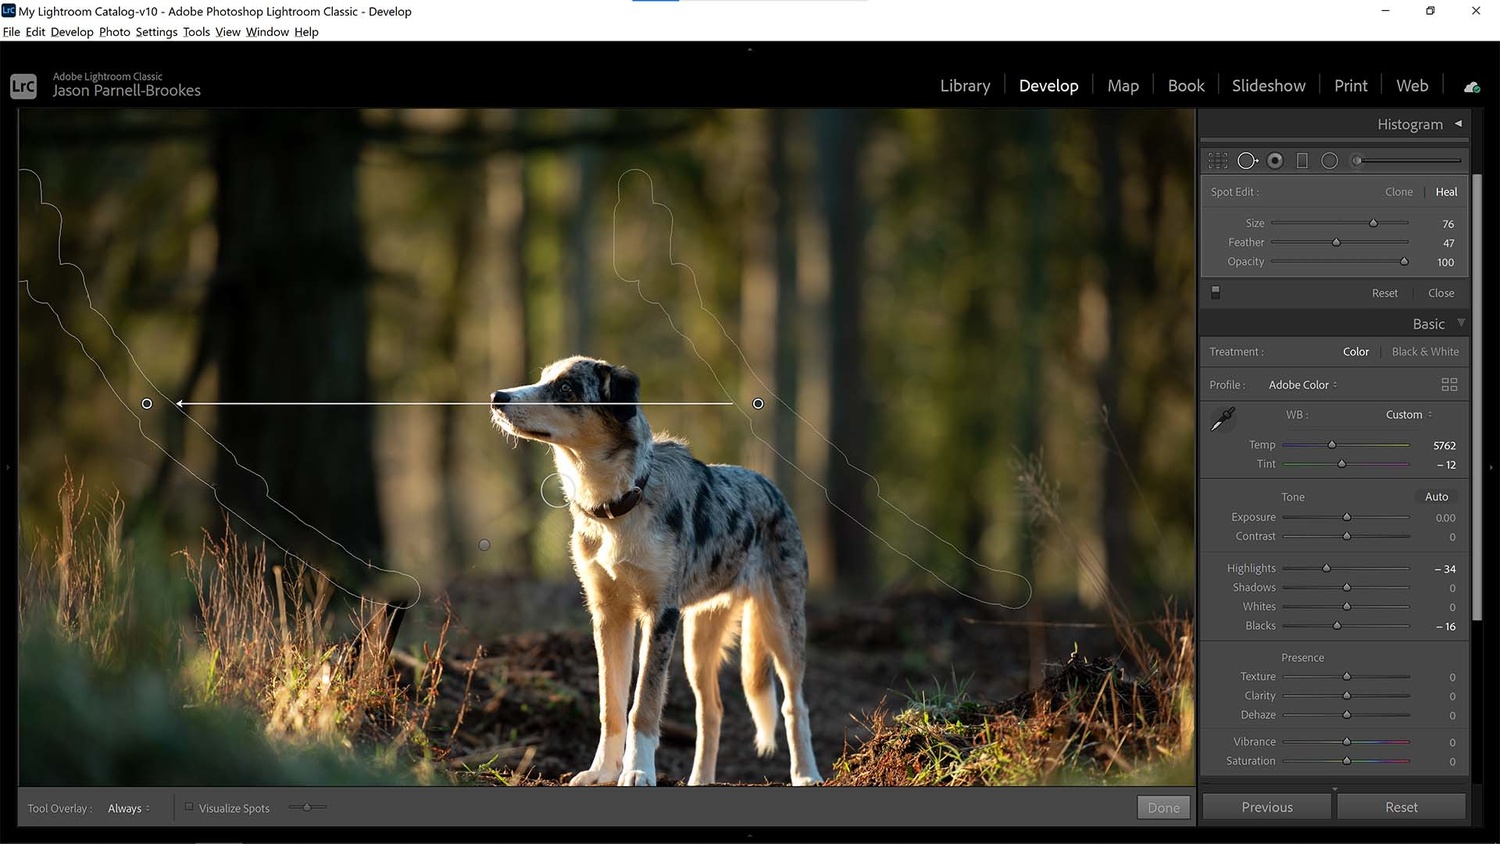
A longer sweep across the frame removed the entire lead without disturbing the fur on Benji's neck.
I then set about removing the rest of the lead and the hand in the shot by selecting the rest of it and letting Lightroom intelligently make its own sample selection to blend in with the background. It did a pretty good job, as you can see here, but the top of the grass on the left-hand side of the image has been cropped off at the top. That's okay, though, because we can fix this when working in Photoshop CC later.
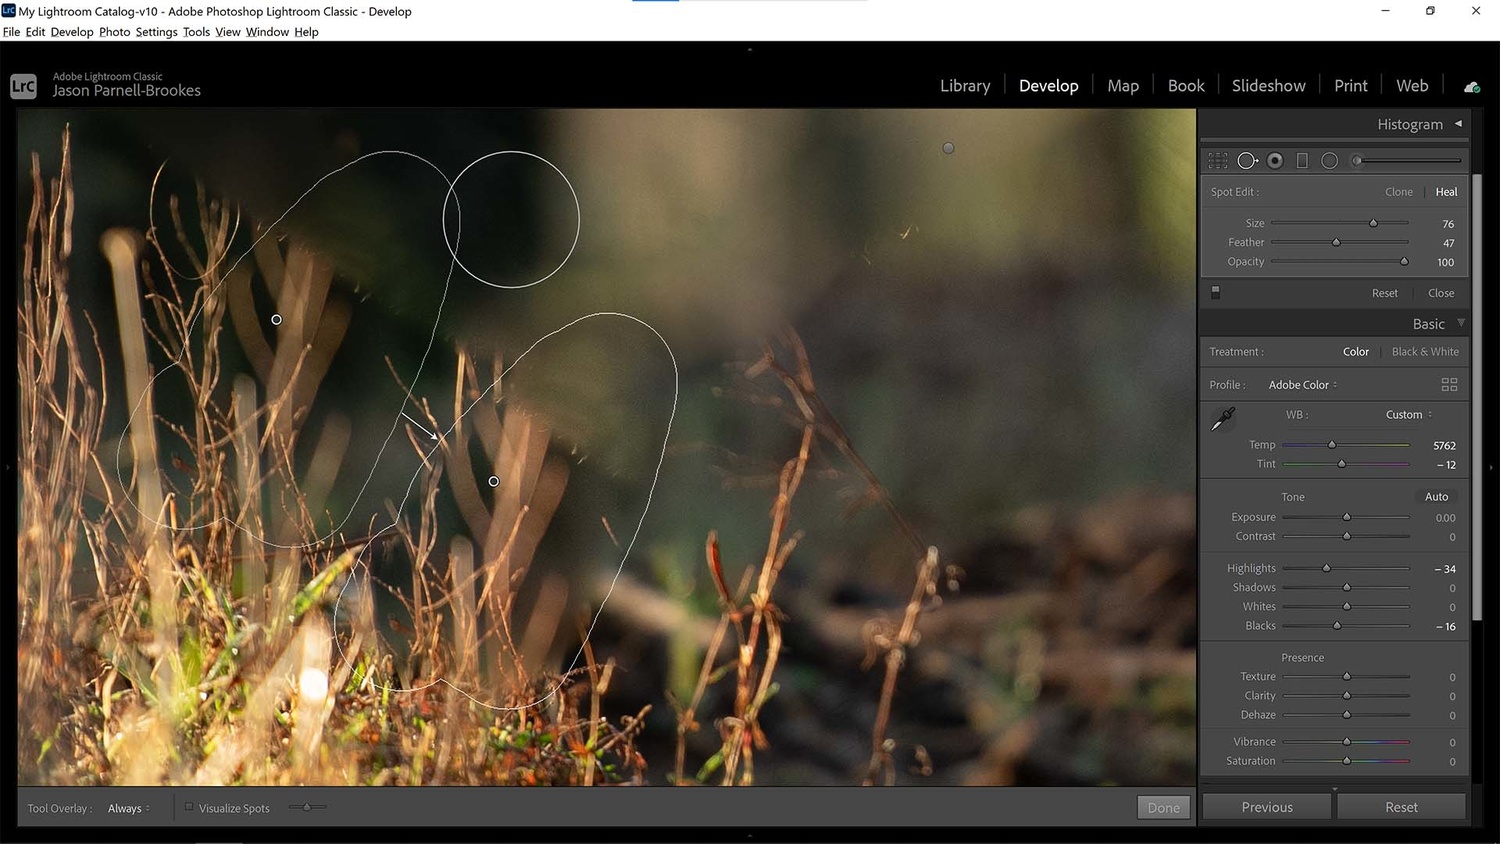
If any flora gets knocked while using the Spot Removal tool, try your best to patch it up, but don't worry too much, as it can be fixed more accurately in Photoshop CC later.
One last piece of lead was visible through the grass, so I zoomed in and delicately drew around this section and again let Lightroom make its own sample suggestion. The entire lead was now removed from view and focus was put on Benji in the middle of the frame, so let's get started editing him.
4. Desaturate Shadows
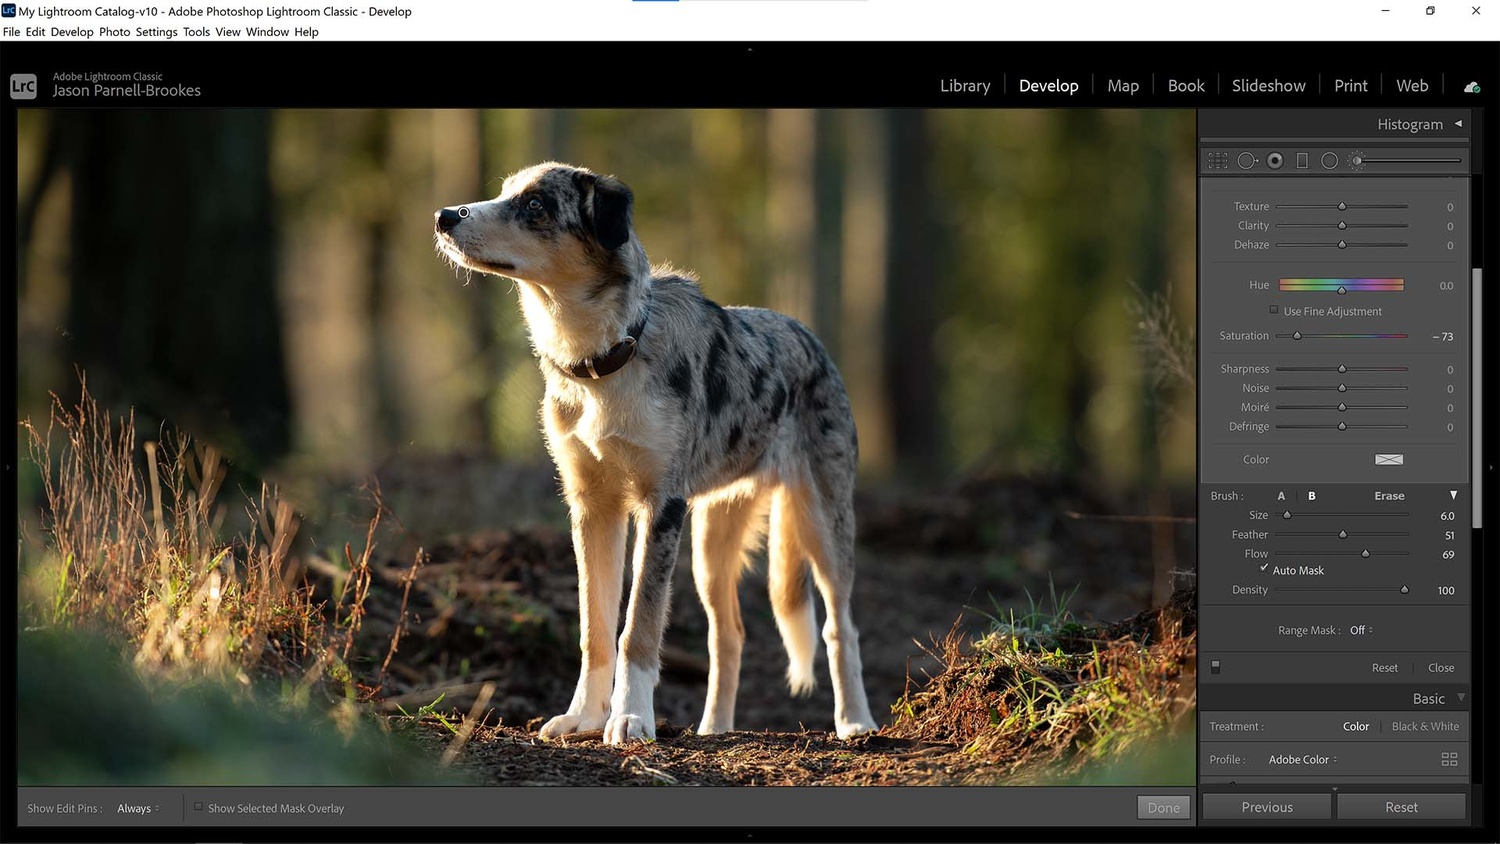
The shadows on Benji's body were dark blue, so I desaturated these areas with the Adjustment Brush to restrict color range.
A restrictive color palette is often quite attractive in portraits. A simplification of color helps us concentrate on specific aspects of portraits, even dog portraits. Noticing that the shadows on the camera-right of Benji were deep blue, I decided to use an Adjustment Brush (K) to brush over only the shaded areas of fur, such as the body, legs, and side of his face — anywhere there was gray fur — and then set the Saturation slider to -73. That meant a little bit of color stayed in the fur, but the blue tone was vastly reduced.
5. Enhance Fur Texture
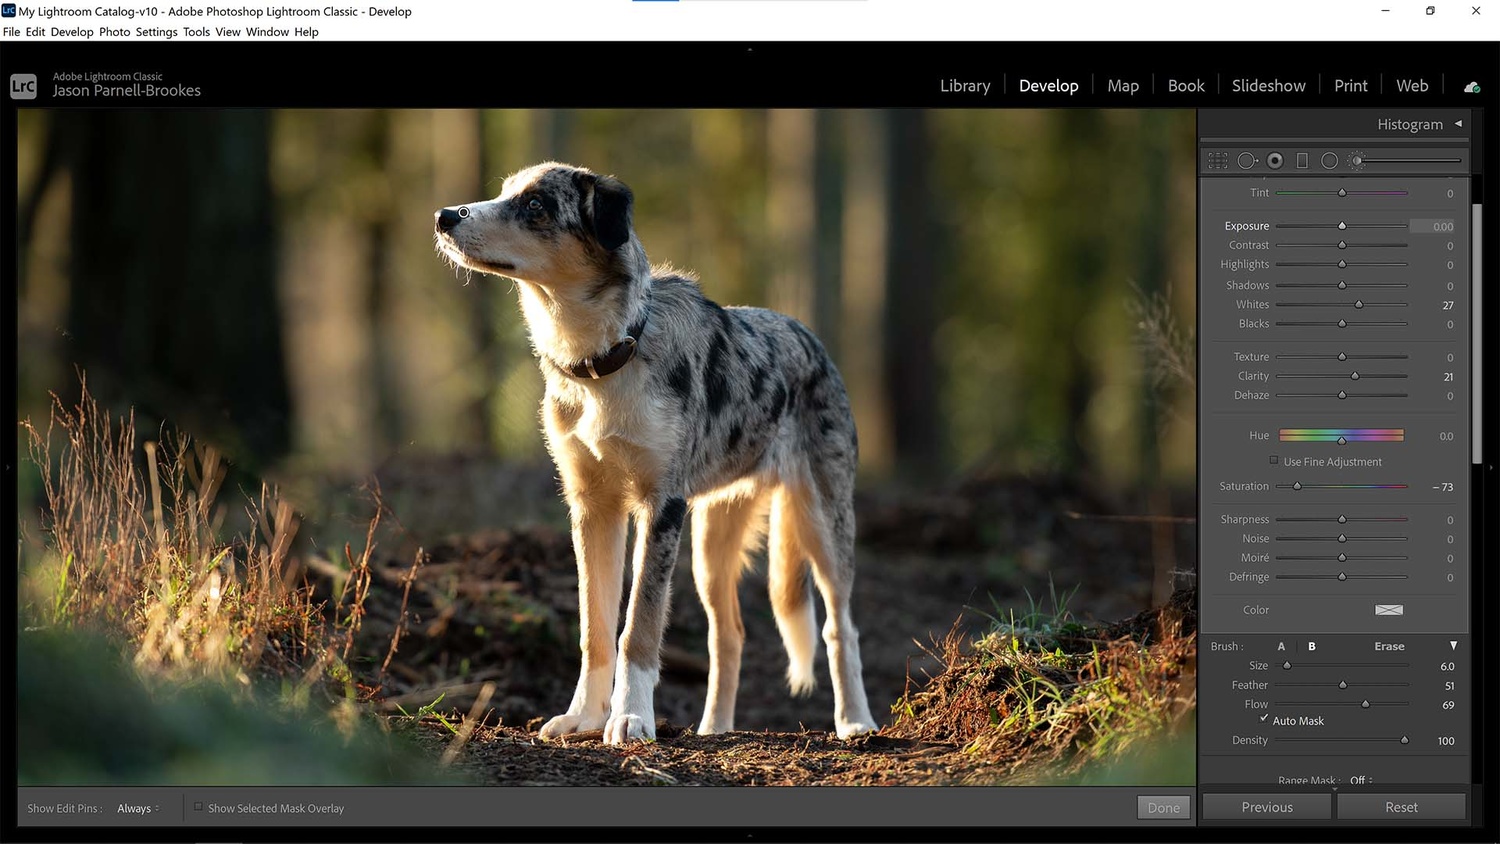
With the same brush, I enhanced the fur texture with the Whites and Clarity sliders boosted.
The main aim with this dog portrait edit is to have the dog isolated from the backdrop. This was done while taking the photo by using a wide aperture on a long telephoto lens to help reduce the depth of field, but now, we can use some editing techniques to enhance this further.
With the same Adjustment Brush, I then boosted the Whites and Clarity sliders to provide a little more texture to the fur, setting Benji apart from the creamy bokeh backdrop.
6. Mask Dog Fur
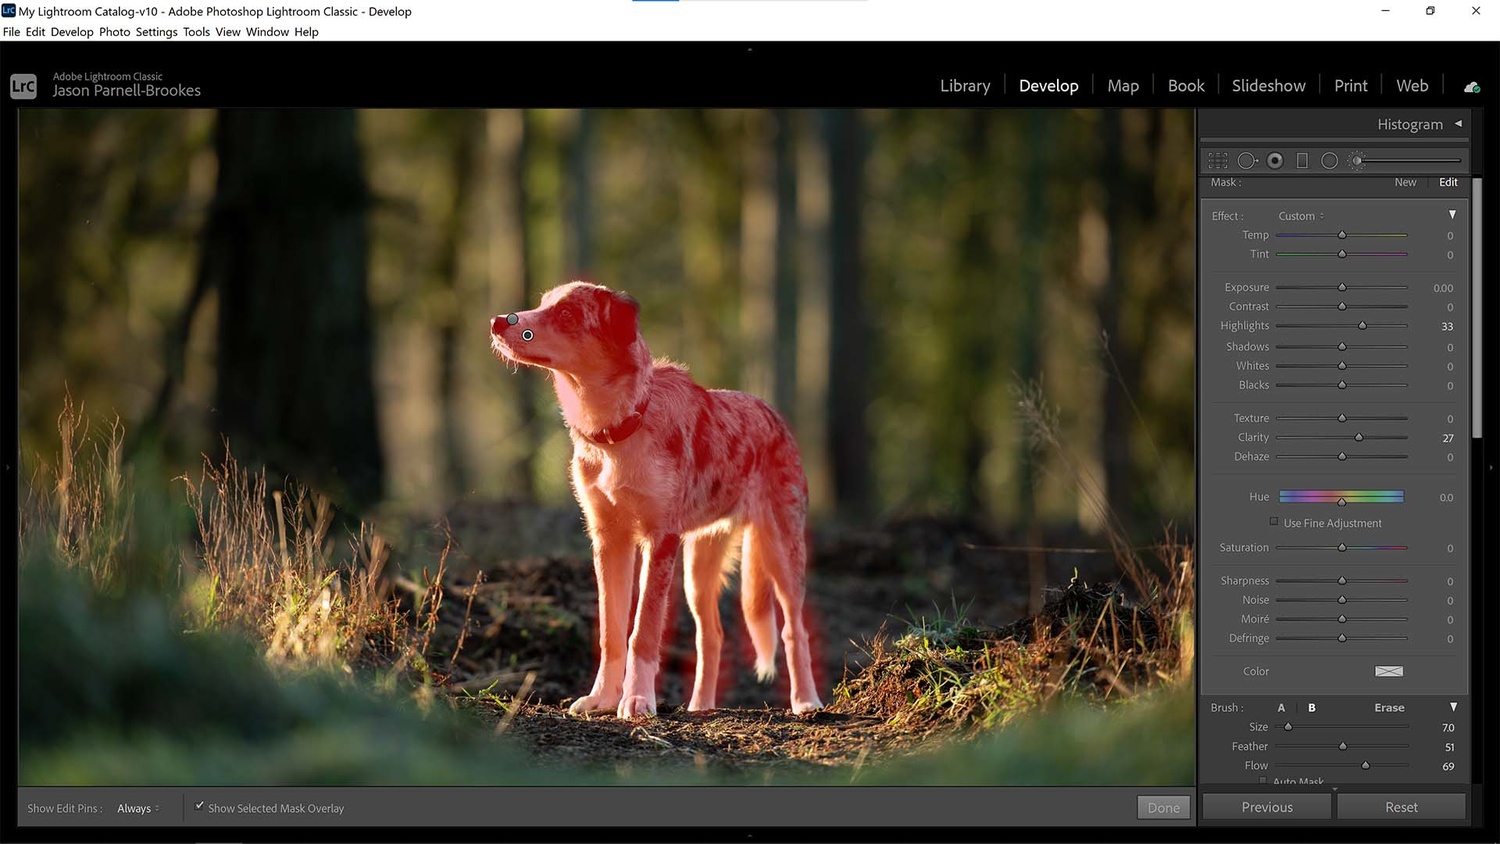
I ran a separate Adjustment Brush all over Benji to enhance the fur texture and help him stand out from the out-of-focus backdrop.
I then wanted to make an overall edit with more Clarity punch-up and some boost in Highlights, so with a new Adjustment Brush, I painted over the entire body and face to keep the edits local to Benji. To find where the mask lies, you can press O on the keyboard or tick the Show Selected Mask Overlay button in the bottom left of the window to reveal the mask in red. Use the Alt key to turn the brush into a subtractive brush to then erase parts of the mask that spilled over onto the background.
7. It's All in the Eyes
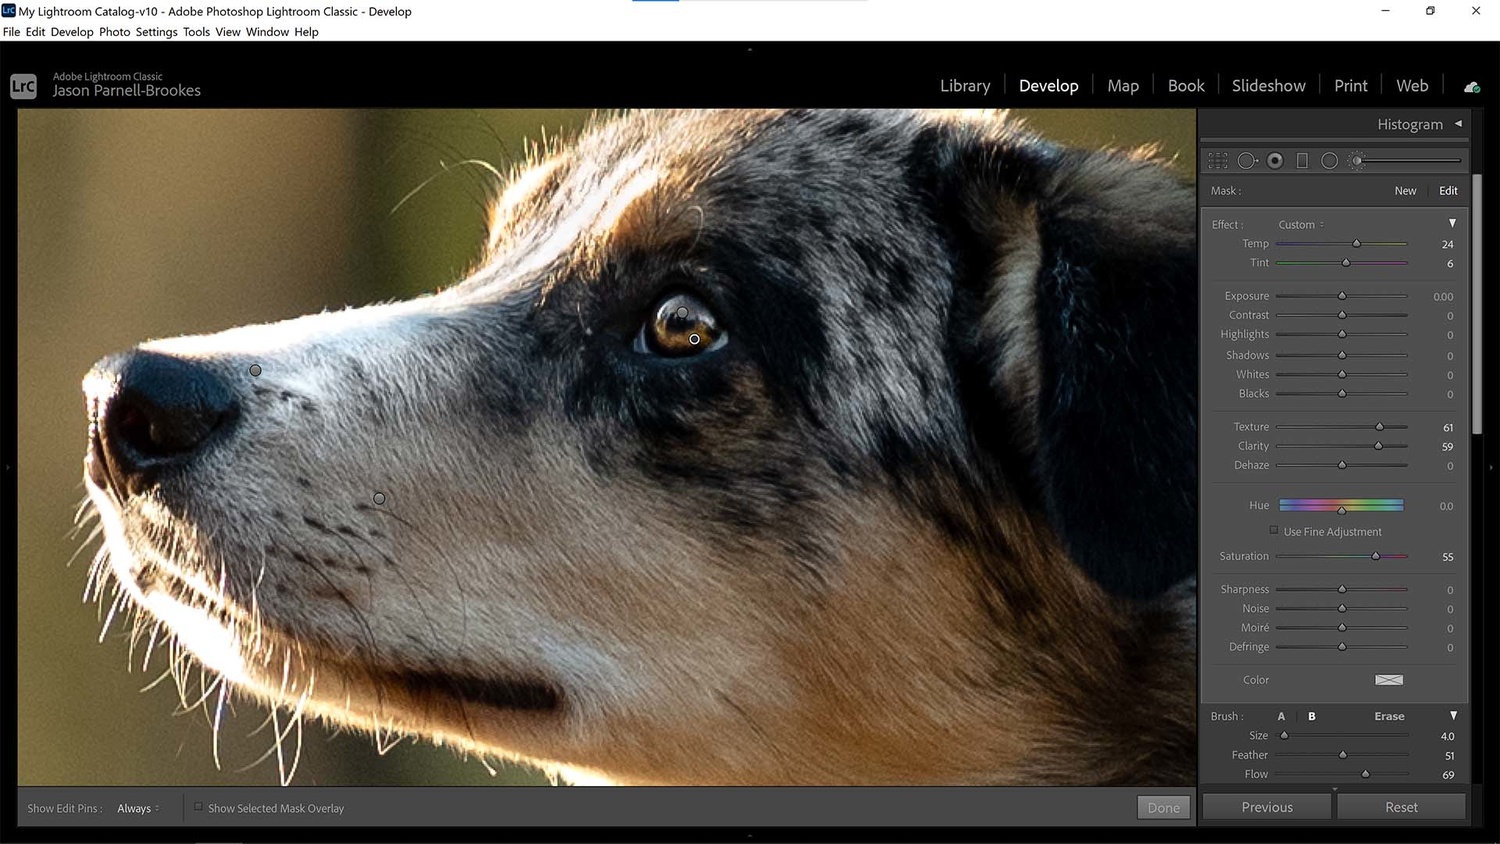
I accentuated the contrast and color of the eye so that it sparkled among the shadows of the dog's face.
The eyes truly are the window to the soul, and I wanted Benji's eyes to sparkle. Unfortunately, the one eye I have in shot here falls in shade, so it isn't particularly bright or sparkly. To counteract this problem, I used the Adjustment Brush and painted the white highlights at the top of his eye and desaturated them from a blue to a near-white. I took a second brush and painted around the brown iris and then boosted the Saturation to 55. In order to tease out more detail in the eye, I also bumped the Texture and Clarity slider up significantly. This boost in localized contrast made Benji's eyes shine. Pay attention not to overdo things at this stage, though, or it'll look unnatural.
8. Warm Up the Foreground
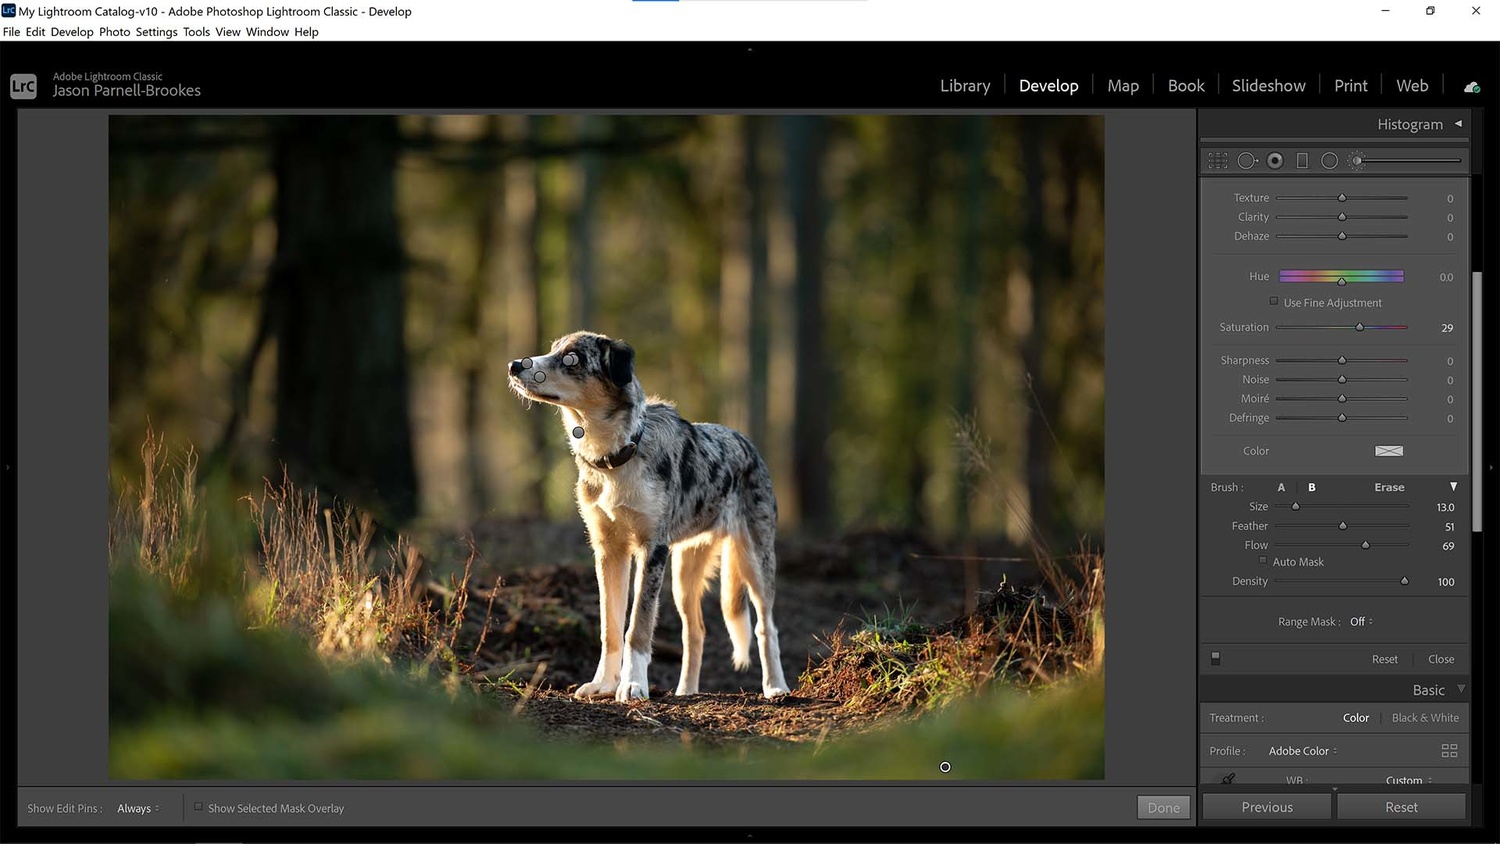
The foreground grass was also blue from shade, so I warmed it up with the Adjustment Brush and boosted the saturation.
Zooming back out, I noticed that the foreground grass at the bottom of the frame was also quite blue because it sat in the shade of a large tree. The slither of light that shone against Benji was very warm and yellow by comparison, so I wanted the grass to match. With the Adjustment Brush, I painted along the grass in the bottom of the frame and shifted the Temp slider up so that it contained more yellow, before also raising the Tint slider, slightly adding some magenta. I then set about raising the Saturation to 29 to give it a little more prominence in the shot.
9. Take It Into Photoshop
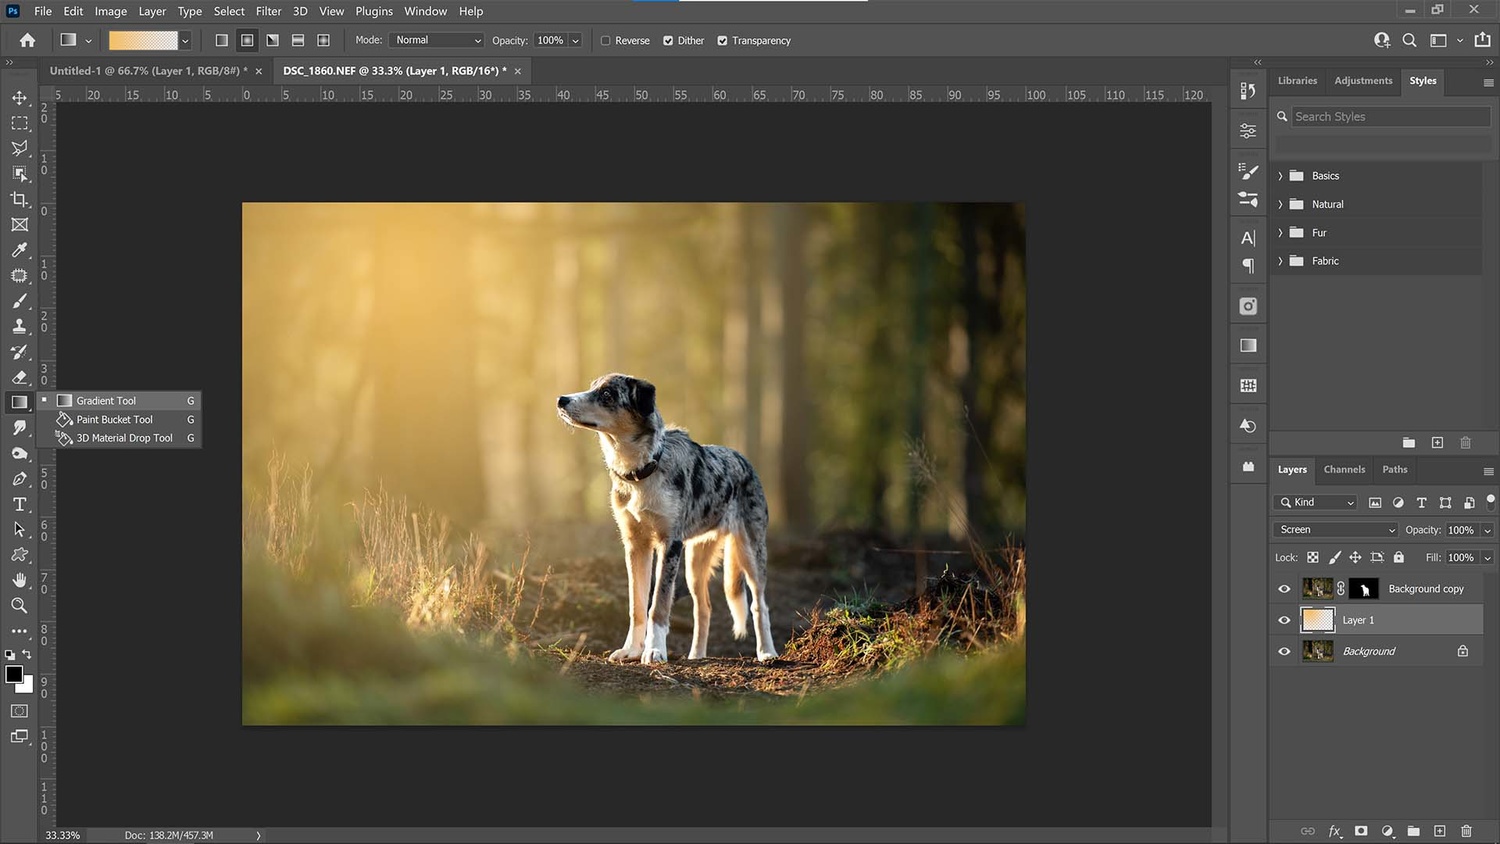
In Photoshop, I selected Benji using a layer mask on a separate layer before adding an orange gradient in-between the two layers to mimic sunlight bursting through the trees.
Once done, I exported the image to Photoshop CC, which you can do by right-clicking and heading to Edit In>Edit In Adobe Photoshop CC 2021. Top tip: if you're having issues with running Photoshop and Lightroom simultaneously, then close down Lightroom once you've opened the image in Photoshop.
From here, I wanted to add a little light flare camera-left to mimic natural sunlight billowing through the trees. I duplicated the layer (Ctrl + J or CMD + J on a Mac) and then used the Object Selection tool (W) to highlight Benji. Photoshop made quick work of making a selection around him, and then, I hit the Add Layer Mask button.
The next step was to create a new layer (Ctrl, Shift + N, or CMD, Shift + N on a Mac) and placed it in-between the two existing layers in the layers palette. I used the Gradient tool (G) to draw out a yellow/orange radial gradient coming from the left of the image, spreading to the right. This was the basis for the sunlight. I changed the layer blending mode to Screen and then tweaked the layer opacity until it was around 30% so that it didn't overpower.
10. Patch the Grass
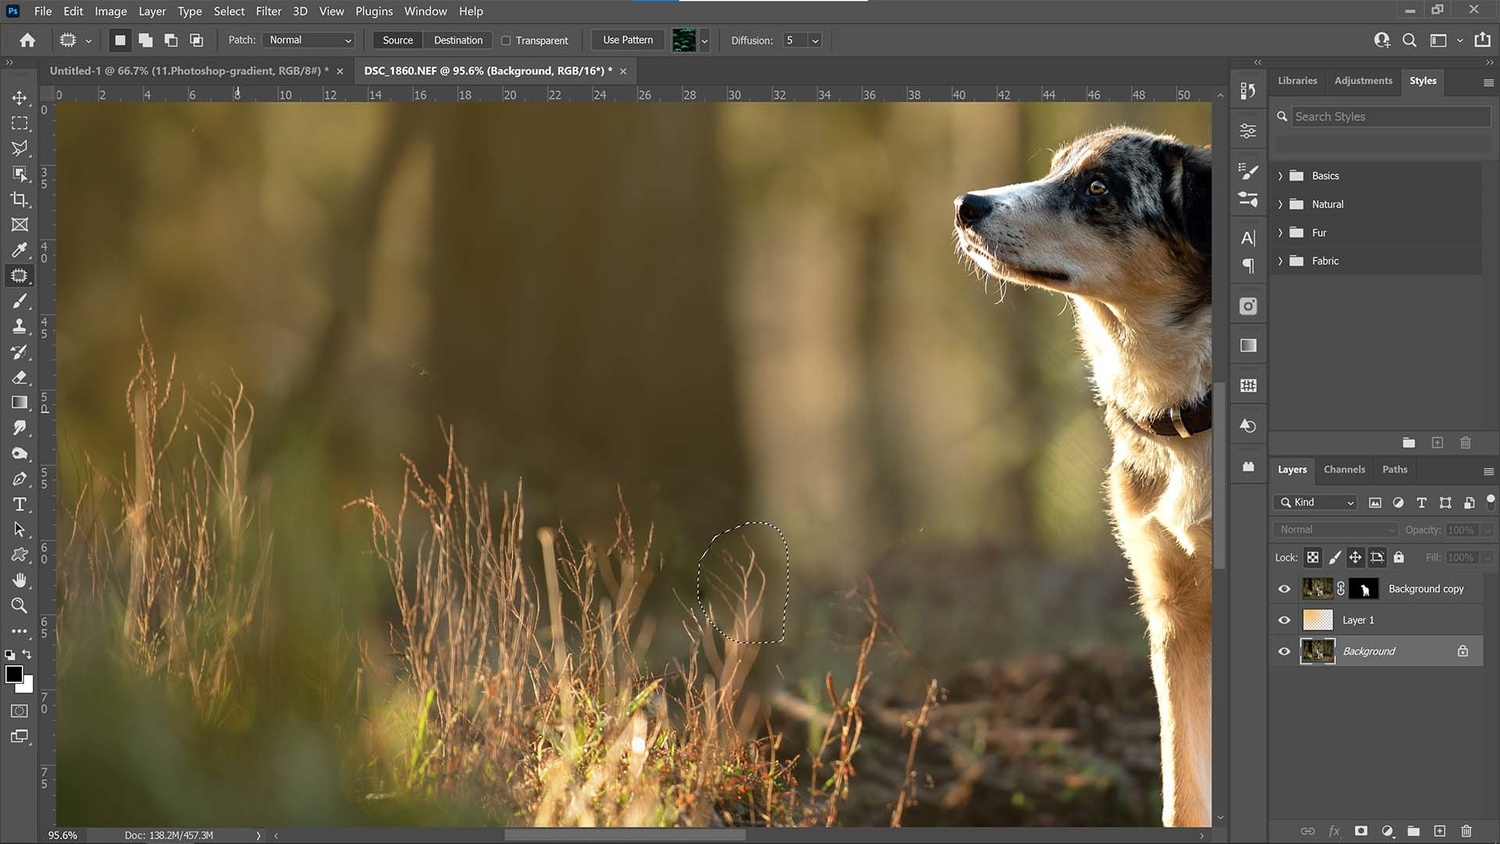
Fixing the clipped grass is easy in Photoshop. Just use the Patch tool to sample from another perfectly good area of grass and allow Photoshop to intelligently overlay it in the right area, adjusting exposure and hue automatically.
Remember those pieces of grass that got cut off with the Spot Removal tool back in Lightroom? Well, we're going to fix that now. With the bottom original layer selected, I used the Patch tool (J) to draw around the affected tips of grass and moved the selection over some long grass on the left side of the frame. The tool took this sample area and drew in the grass tips for me, giving more realistic-looking grass.
11. Draw Attention to the Center
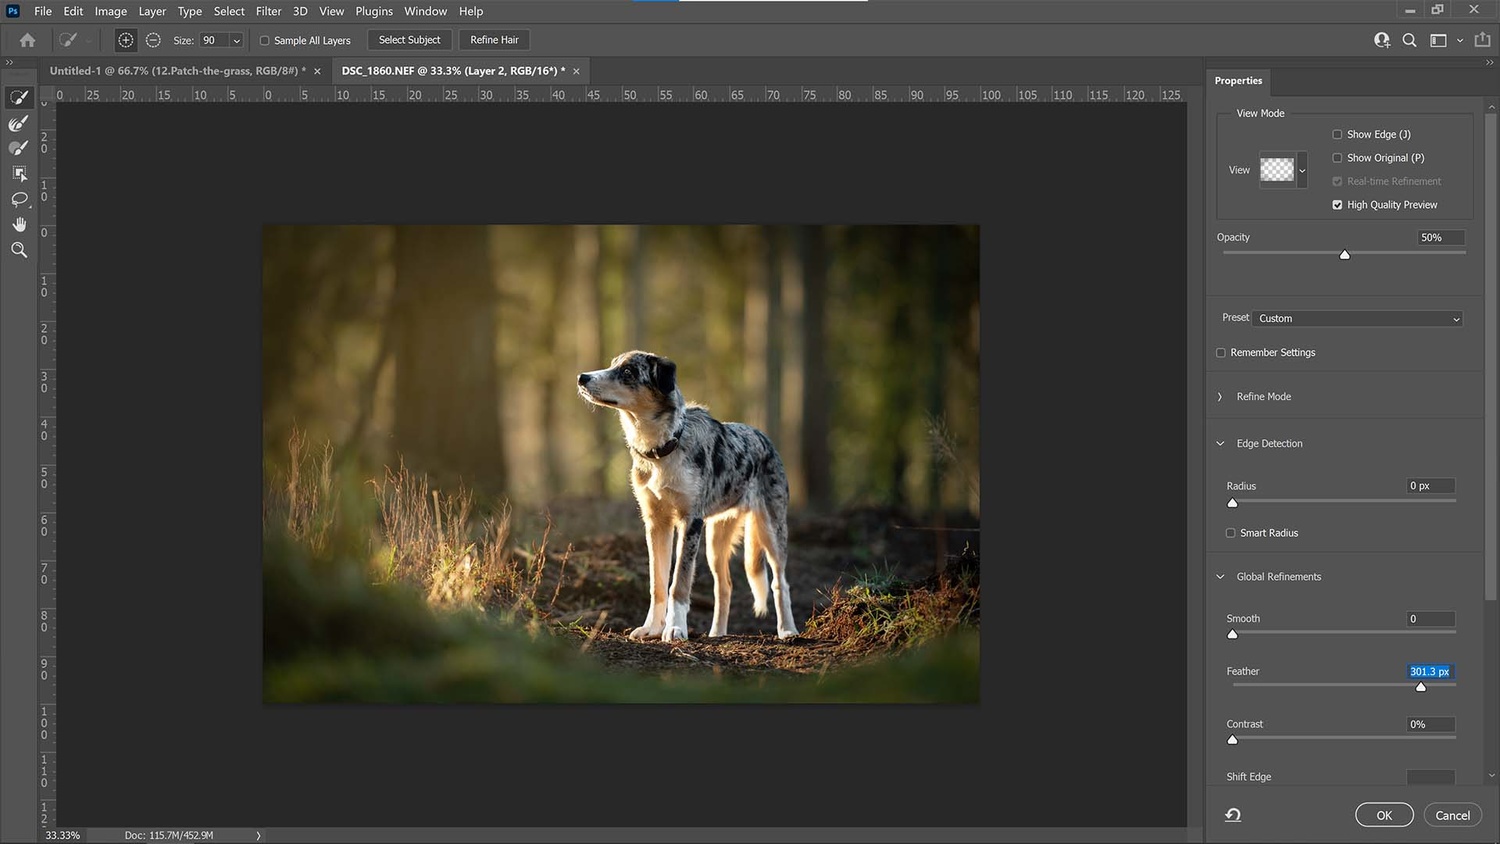
I wanted to draw the eye into the center of the frame, and since the eye is drawn to the brightest part of the image, I set a dark vignette around the edge of the frame.
My final edit was to create a dark vignette around the edge of the photo. I made a slight crop before doing this so that Benj was placed more off-center to the right-hand side. Then, I took the Elliptical Marquee tool (M) and drew from a space in the top left of the frame to the bottom right to create an oval that didn't quite fill the image.
Next, I right-clicked, went to Select and Mask, and then boosted the Feather slider to over 300 px to make the selection's edges soft. I clicked OK and then inverted the selection with Ctrl, Shift + I (CMD, Shift + I on a Mac) and got the Paint Bucket tool (G), set my foreground color to black (D), and filled in the color. To allow the vignette to blend even better, set the layer blending mode to Soft Light and reduce the opacity to 30% or so. The center of the frame should now be the brightest part of the image, with the eye naturally drawing to Benji in the middle.


Useful, thank you. And thank you for doing this in text and not forcing me to watch a video.
I'm curious why you didn't appear to use off-camera flash and a warming filter?
When I'm shooting my Japanese Spitz, it's always my preference to have her front-lit - White fur makes the different colour temps really show :-)
There is a case for getting lazy and not carrying all the extra equipment when these types of edits are pretty easily accomplished after the fact. Less kit, less weight, more spur of the moment type shoots
If I'm going out to shoot I'm carrying roughly 10KG of gear anyway, so 800 grams for a flash isn't really hear nor there for me :-)
Thanks for this article, especially the gradient workflow. Really speeds up my edits.
Sorry but I found the removal of the "distracting" leash to be unintentionally hilarious. Whatever else this fairy-tale "portrait" might be delivering, it's not authenticity.
No one really cares Jim. It's a family dog photo. Nobody wants to see the leash, and that's ok. The article is about editing if you missed it, not your deliverance of every photo needs to be 'authentic' mantra.